Repairing a curb at home can be both a rewarding and practical project that improves your property’s curb appeal and safety. However, tackling curb repair without the right tools can quickly become frustrating and inefficient. Whether you’re fixing cracks, chips, or larger damaged sections, having the right equipment is essential to achieve a durable and clean finish. This article covers the essential tools you need for curb repair at home and guides you through their uses, so you’re fully prepared to restore your curb to its former glory.
Understanding Curb Repair: Why It Matters
Curb repair might seem like a minor maintenance task, but it plays a significant role in the overall appearance and safety of your home’s exterior. A well-maintained curb prevents further damage, such as water infiltration or widening cracks, that can escalate into costly repairs. Moreover, damaged curbs can pose hazards to pedestrians and vehicles, so addressing problems early is crucial.
Common Causes of Curb Damage
Before diving into the repair, it’s important to understand why curbs get damaged in the first place. Common causes include:
- Weather Effects: Freeze-thaw cycles can cause concrete to crack.
- Vehicle Impact: Cars scraping or bumping against the curb.
- Tree Roots: Roots growing beneath curbs can cause lifting and cracking.
- Aging: Natural wear and tear from years of exposure.
- Poor Initial Installation: Weak materials or improper mixing.
Knowing these causes helps you tailor your repair approach and possibly prevent future damage.
Preparing for Your Curb Repair Project
Preparation is key to a smooth and successful curb repair. Before starting, you need to gather information, take safety measures, and assess the damage carefully.
Safety Precautions to Consider
Safety should always be your top priority. Wear protective gear such as gloves, goggles, and a dust mask. Ensure the area is clear of pedestrians and vehicles. If working near traffic, use cones or warning signs to alert others.
Assessing the Damage
Take time to inspect the curb thoroughly. Look for cracks, chips, loose concrete, or spalling. Mark the damaged areas to know exactly where to focus your repair work. This will help you decide the amount of material and which tools you’ll need.
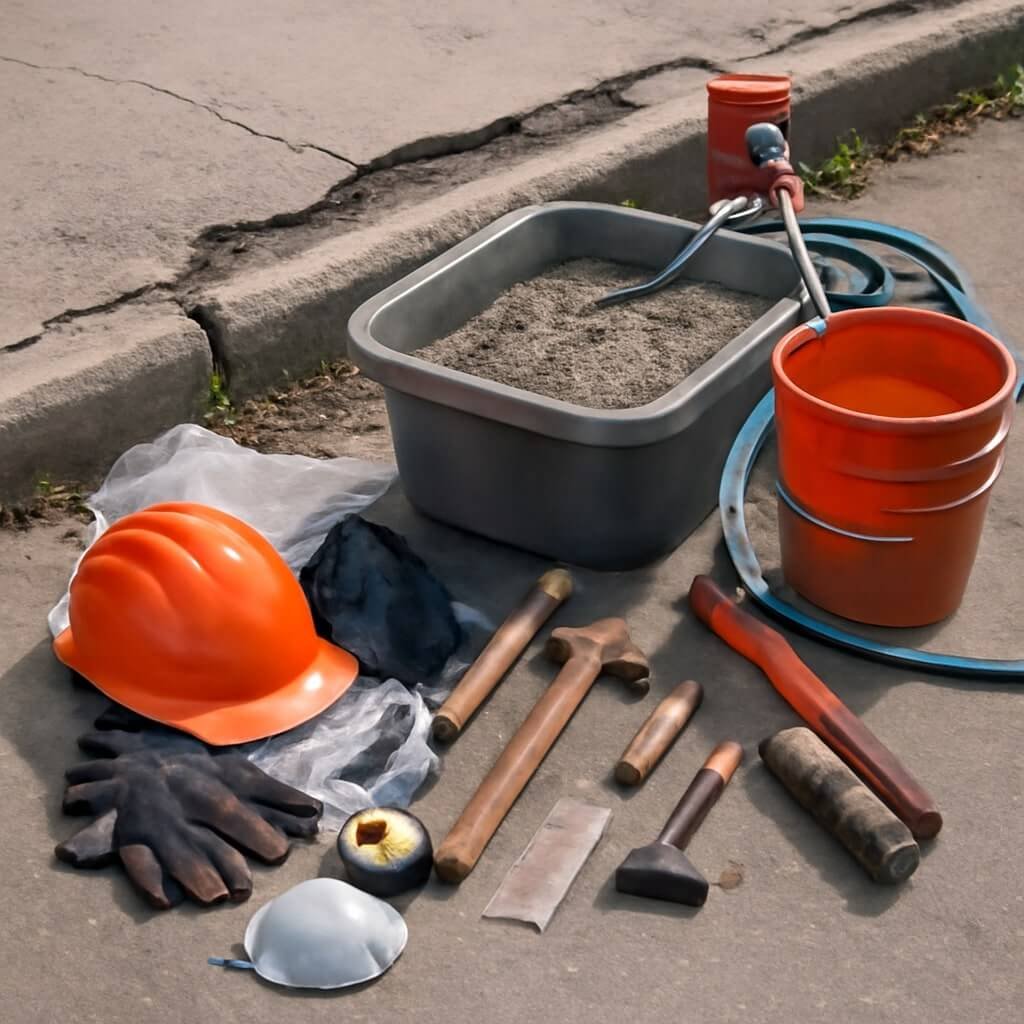
Essential Tools for Effective Curb Repair
Having the right tools makes all the difference between a patchy fix and a professional-looking curb. Here are the ten most powerful must-have tools for curb repair at home:
Tool 1: Concrete Mixer or Mixing Bucket
A proper concrete mixer helps you blend the repair mortar or concrete evenly. For small jobs, a simple mixing bucket and a sturdy mixing stick will suffice. The goal is to get a consistent, lump-free mix for easy application.
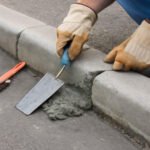
Tool 2: Trowel and Float
These hand tools are indispensable for shaping, spreading, and smoothing the concrete repair material. The trowel is used to apply and move the mix, while the float helps you achieve a smooth, flat finish.
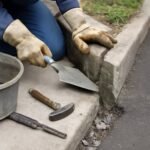
Tool 3: Chisel and Hammer
To remove loose or damaged concrete sections, a chisel and hammer are essential. They allow you to clean up the area and create a stable base for the new material to bond with.
Tool 4: Measuring Tape and Level
Precision matters in curb repair. Use a measuring tape to size the repair area and a level to ensure your repairs are even and flush with the existing curb.
Tool 5: Safety Gear
Always protect yourself with gloves, goggles, dust masks, and knee pads if needed. Handling concrete and tools can expose you to dust, sharp edges, and potential injury.
Tool 6: Concrete Repair Mortar or Patch
Specialised repair mortars are formulated to bond well and cure quickly, providing a durable fix. Choose one designed for curb or concrete repair to ensure longevity.
Tool 7: Wire Brush and Broom
Before applying new concrete, clean the repair area thoroughly. Use a wire brush to remove dirt, debris, and loose particles, followed by sweeping with a broom to create a clean surface.
Tool 8: Caulking Gun and Sealant
After the repair cures, sealing cracks with a high-quality sealant prevents water intrusion and extends the life of your work.
Tool 9: Water Source and Hose
Water is necessary both for mixing concrete and for curing. Keep a hose or buckets of water handy to dampen the repair surface before application and to cure the concrete afterwards.
Tool 10: Plastic Sheeting or Curing Blankets
Concrete needs protection as it cures. Cover your repair with plastic sheeting or curing blankets to retain moisture and ensure proper hardening, especially in hot or dry conditions.
Step-by-Step Guide to Using These Tools
- Remove damaged concrete: Use your chisel and hammer to clear out loose or broken pieces.
- Clean the area: Scrub with a wire brush and sweep the surface to ensure it’s free from debris.
- Mix the repair mortar: Combine materials in your bucket or mixer until smooth.
- Apply mortar: Use the trowel to fill cracks or holes, shaping and smoothing with the float.
- Level and shape: Check your work with the level and adjust as necessary.
- Cure the repair: Dampen the area and cover it with a plastic sheeting for several days.
- Seal cracks: Once fully cured, apply sealant with a caulking gun to protect your repair.
Tips for Maintaining Your Curb After Repair
- Regular Inspection: Check for new cracks or damage.
- Keep It Clean: Remove dirt and debris to prevent deterioration.
- Avoid Harsh Chemicals: Salt or strong cleaners can weaken concrete.
- Protect from Vehicle Impact: Use barriers if parking is close to the curb.
Frequently Asked Questions (FAQs)
1. How long does a curb repair take to cure?
2. Can I use regular concrete for curb repair?
3. What if the damage is too large?
4. How often should I inspect my curb?
5. Is it necessary to seal the curb after repair?
6. Can I repair a curb myself without prior experience?
Conclusion: Ensuring a Durable Curb Repair at Home
Repairing your curb at home is a smart way to maintain your property’s safety and appearance. Using the essential tools you need for curb repair at home ensures that the job is done right the first time. With proper preparation, the right materials, and care during and after the repair, your curb can look great and last for years to come.